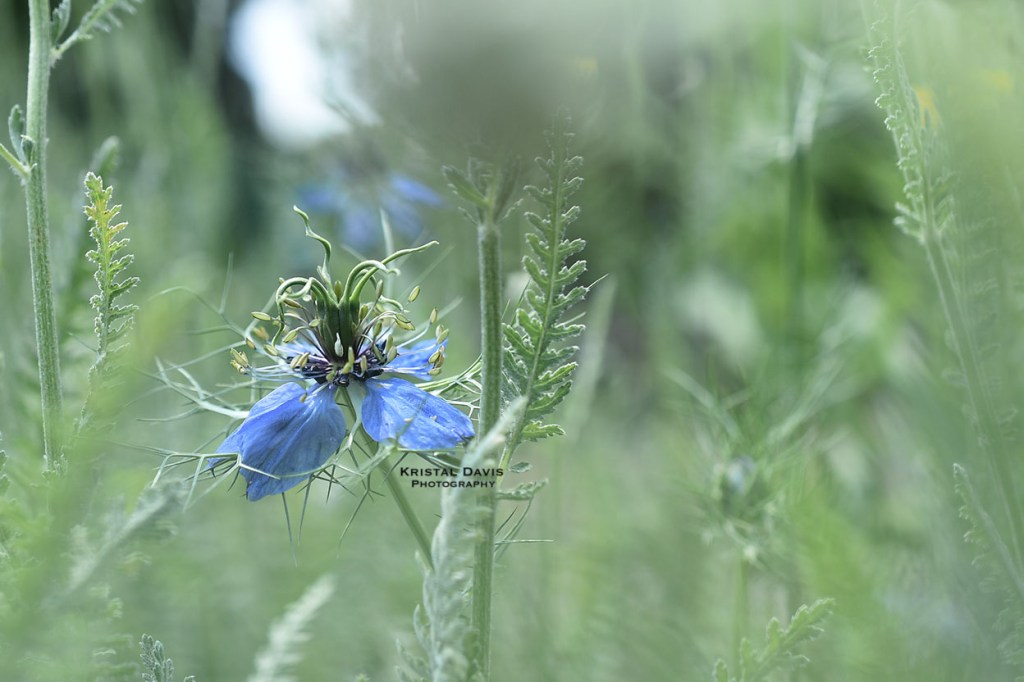
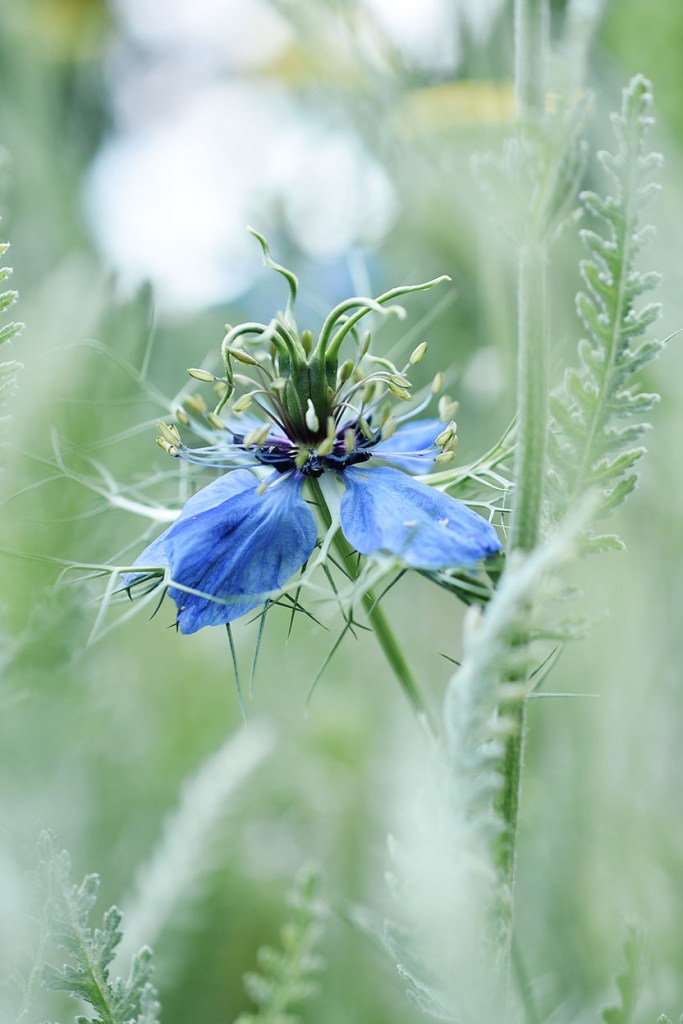
A friend photographs one flower yearly that I just find to be so beautiful. I had never seen one in person.
And then last summer I was at a local park with a beautiful garden. As I was taking pictures I noticed this blue flower hiding and I instantly knew it was Love in the Mist!
It is such a dainty, small flower. The light was quickly fading for me and I wasn’t sure when I’d get back to the park so I did the best I could to grab a few images. I will certainly be going back this summer to get more images.
When I became a mom, I started taking pictures. SO. MANY. PICTURES. My husband joked I could have paid for my own photo lab with all the pictures I printed… because *cough* that was before digital and we printed everything.
I didn’t know much then, and since you couldn’t see what you were doing you hoped for the best when you picked up the prints. As digital came out and I switched to that format, I was in full auto mode. But then I met another mom who was a photographer and she helped me change to manual and, eventually, I began my own photography business.
As my children grew I hoped one of them would want to share my passion and although they dabbled it but no one really was interested. But I had my chance recently as my missionary son purchased a used Nikon D90. As he travels the world it will be nice for him to have this amazing camera with him.
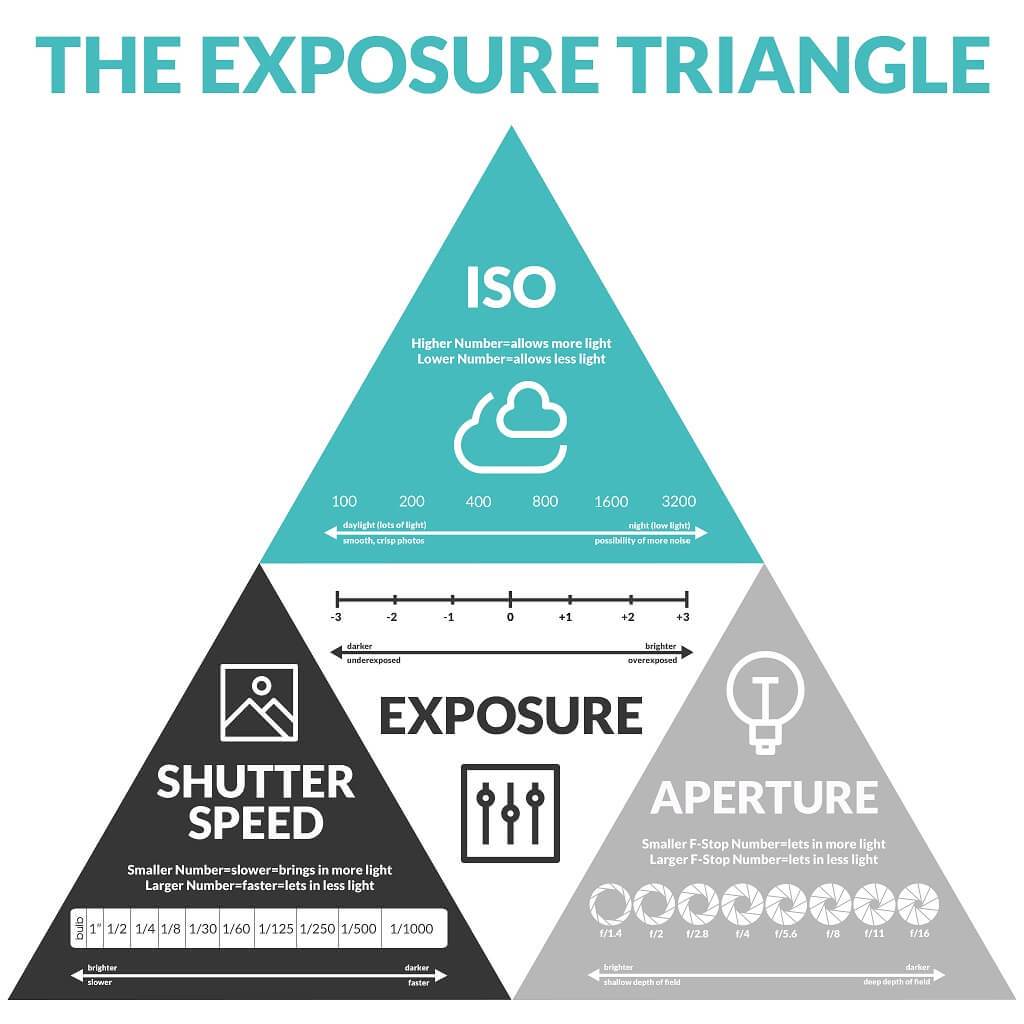
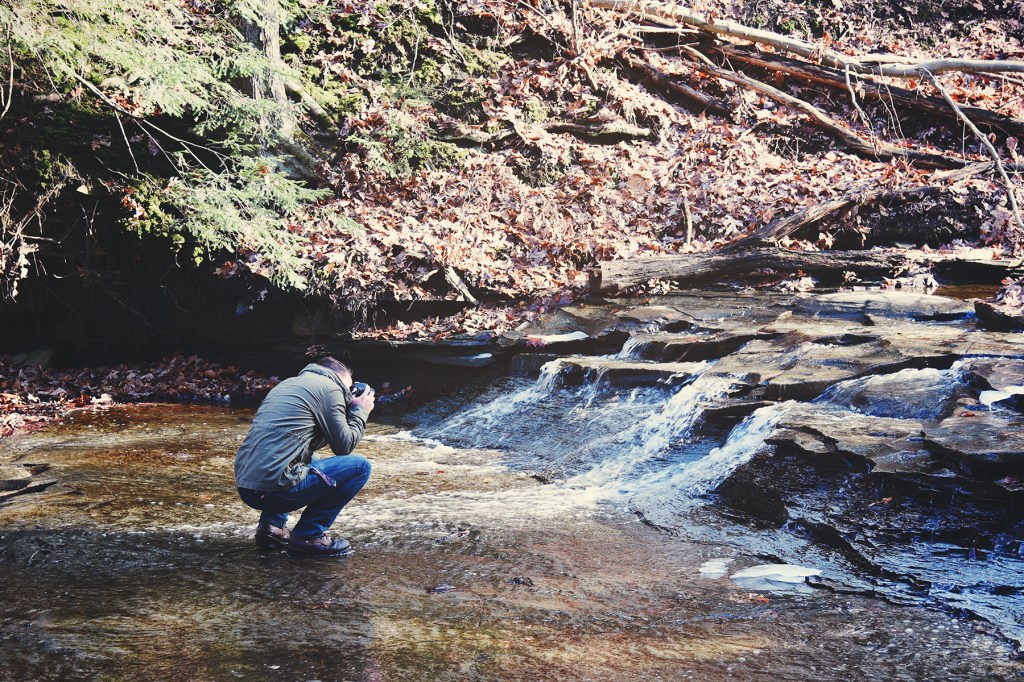
Recently, we went on a hike so I could show him how to use it on manual. I wanted to get him started right. I thought I’d share with you the basics I shared with him. It’s pretty basic but quickly can get anyone shooting on manual. I just explained the Exposure Triangle.
For me, I start with the ISO. I shoot on a Nikon D850 which handles an amazingly high ISO when I’m in low light, but the D90 I wouldn’t push much above 800. I read once in a Bryan Peterson book to think of ISO as how many bees you need to send out to gather light to help you take great picture. When it’s bright (or sunny) you don’t need many bees, so go with 100-200, but when it’s dark, choose the higher numbers.
Next up, I choose my aperture. I love “wide open” apertures. If the lens I’m using can go to 1.4, I’ll use it all the time. That gives you the nice creamy background or bokeh. It really is rare that I go higher, but I might play with it if my shutter speed is running to low with the ISO I want to stay at.
Third is my shutter speed. Too slow and you’ll have blurry pictures and this one you have to take into play the subject you’re shooting and the lens you have. When I use the 70-200, I don’t go under 1/200s because I know that I’ll get the sharp pictures I want. But if I’m using my 50mm and working with a toddler who moves FAST and OFTEN, I’ll want a higher ISO to stop their motion. But setting this aside, I use shutter speed to get the exposure right…. I dial it up or down to get the bar in the middle or 2 spaces to the right or left of middle.
Let me add, that if I know I have to use a higher shutter speed and don’t want to play with that then I just change the other two parts of my triangle to get the exposure right.
Clear as mud? If you try it with a still object and different lighting you’ll start to see what I mean. And then try something moving, like a dog, child, or your husband that never stops talking when you take pictures (that would be mine… sigh, so many weird pictures of him). Or find a friend that likes to take pictures and shoot together as you figure this out. Makes for a fun, hopefully kid free, afternoon.
In the end, my son understood, and as we walked along trying it out I helped him see how it worked, what would happen to the picture if the exposure triangle was off, and even some tricks to really throw his young brain a twist. Hopefully we can get out a few more times before he goes on his next adventure with Teen Missions so I can be sure he understands and is able to bring home amazing pictures to share with family, supporters, and have for years to come.